Hydraulic and Mechanical Maintenance Checks for Stone Crushing Machines
Stone crushing machines work under some of the harshest conditions in construction and aggregate production. Every hour of operation brings heavy impact loads, constant vibration, abrasive dust, and rock that wears down steel surfaces. Hydraulic systems adjust settings, clear blockages, and power key functions. Mechanical components such as crushing chambers, bearings, belts, and conveyors carry material from the feed hopper to the stockpile. When all of these systems work together, the crusher delivers steady output, consistent product size, and predictable operating costs.
That performance depends on maintenance. Small problems in a crusher rarely stay small. A weeping hydraulic fitting can turn into a burst hose. A worn jaw plate can change the product size and strain the frame. A misaligned belt can overheat, slip, or fail mid-shift. A conveyor clogged with buildup can stall the whole processing line. Each of these issues is easier and cheaper to correct when it is caught early.
Regular inspections help find wear, leaks, loose parts, and operating changes before they lead to downtime or unsafe conditions. They also protect the people who operate and service the equipment. Crushers hold large amounts of stored energy in hydraulic pressure, rotating masses, and raised components. A disciplined inspection routine, built around safe isolation procedures, keeps maintenance work controlled and predictable.
Hydraulic Fluid and Leak Inspection
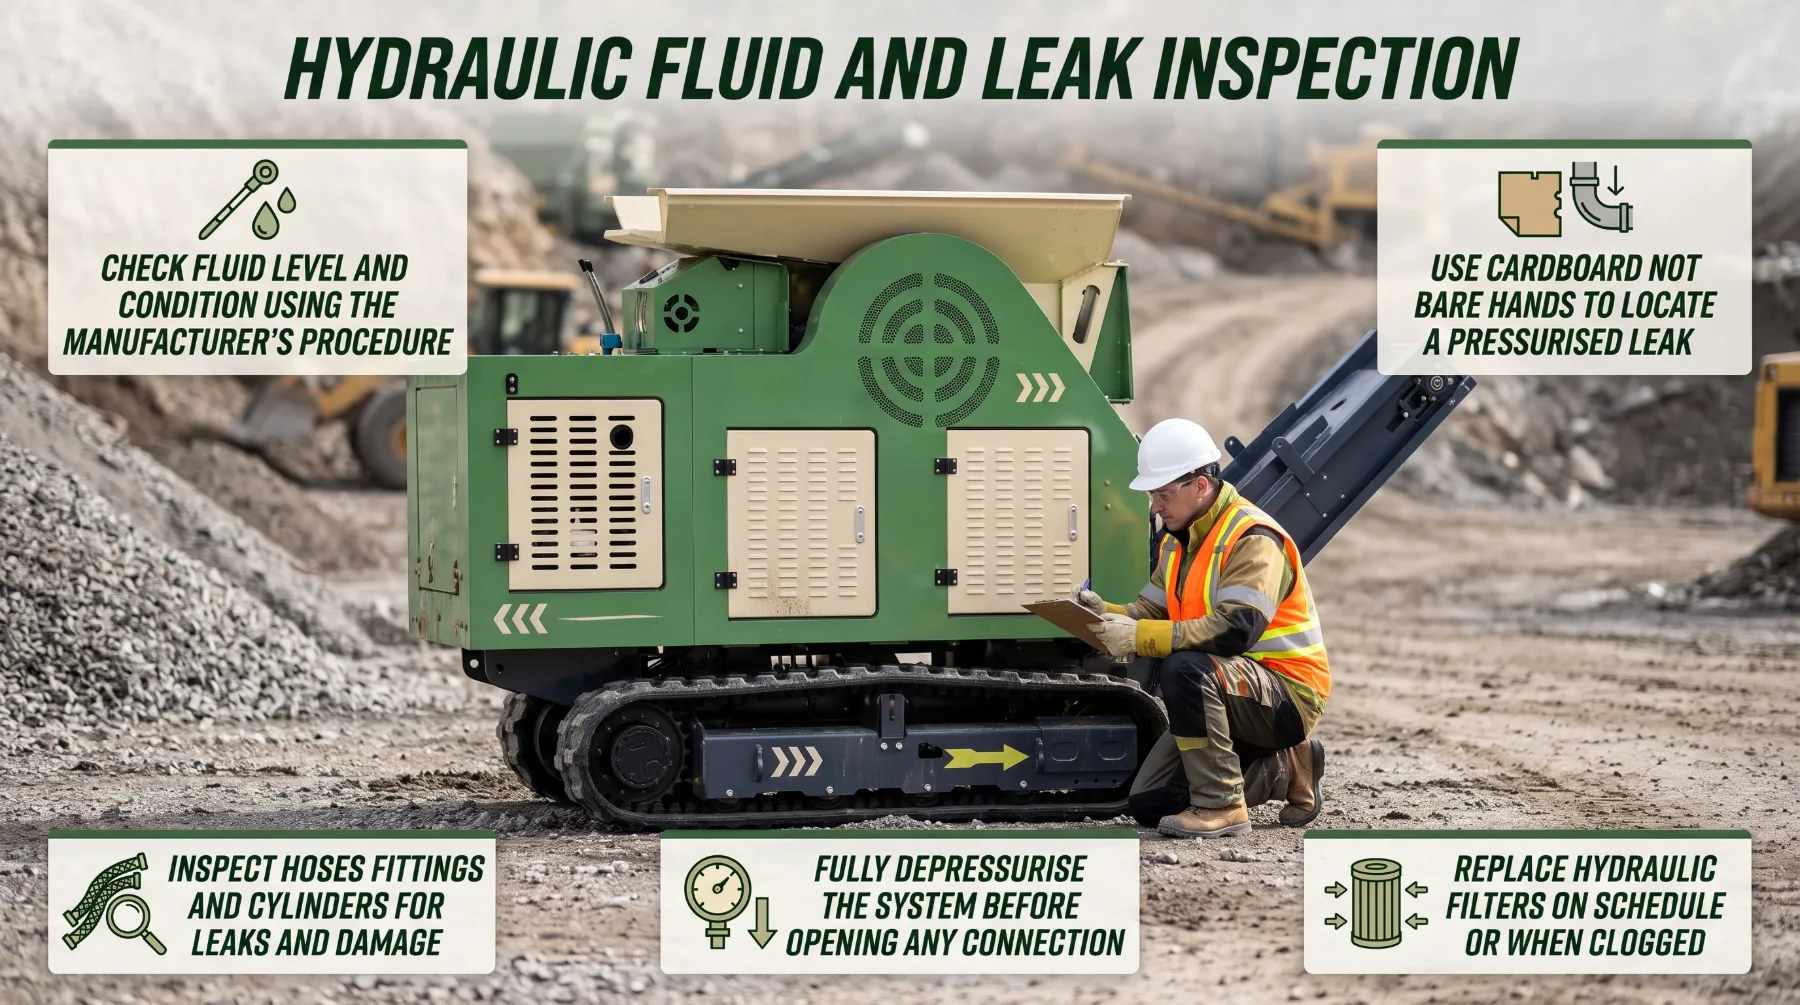
Hydraulic systems play a central role in many stone crushing machines. Depending on the design, they may adjust the stone crusher setting, provide overload or tramp relief, clear the crushing chamber, raise and fold conveyors, operate tracks, or position the feed hopper. A healthy hydraulic system responds smoothly and holds settings reliably. A neglected one can drift, overheat, leak, or fail at the worst possible moment.
Start with the fluid itself. Check the hydraulic fluid level and condition according to the manufacturer’s procedure. Many machines require the level to be checked with components in a specific position, such as cylinders retracted, and with the fluid at a certain temperature. Reading the level under the wrong conditions can lead to overfilling or underfilling.
Fluid conditions reveal a great deal about the health of the system. Watch for:
- Discoloration: Dark or burnt-looking fluid can indicate overheating or breakdown.
- Milky or cloudy appearance: Often a sign of water contamination.
- Foaming: May point to air entering the system or the wrong fluid type.
- Debris or sediment: Metal particles or grit suggest internal wear or contamination from dust.
- Unusual odor: A burnt smell can signal excessive operating temperatures.
Always use the specified fluid. Mixing fluid types or using a product that does not meet the manufacturer’s specification can damage seals, reduce lubrication, and shorten component life. Keep fill caps, breathers, and the area around them clean, since crusher dust entering the reservoir can quickly contaminate the entire system. Replace hydraulic filters on schedule and sooner if a restriction indicator shows they are clogged.
Never search for a pressurized leak with bare hands. Fluid escaping from a pinhole leak under pressure can penetrate the skin and cause serious injury, even when the leak is too small to see. Use a piece of cardboard or wood to locate a suspected leak, and wear gloves and safety glasses. Anyone who suffers a fluid injection injury needs immediate medical attention, even if the wound looks minor.
Before servicing any hydraulic component, depressurize the system according to the manufacturer’s procedure. Shutting off the engine or motor does not always relieve all pressure. Accumulators, cylinders holding raised loads, and trapped pressure in lines can all store energy. Lower or mechanically support raised components, relieve pressure using the approved method, and confirm the system is at zero pressure before loosening any connection.
Key takeaway: Check fluid level and condition using the manufacturer’s procedure, inspect hoses, fittings, and cylinders for leaks and damage, never use bare hands to find a pressurized leak, and fully depressurize the system before service.
Bearings, Belts, and Drive Components
The drive system transfers power from the engine or motor to the crushing mechanism. Bearings support shafts that carry enormous loads, belts transmit power under constant strain, and couplings connect rotating components. When any part of this system starts to fail, the warning signs often appear well before a breakdown, provided someone is looking and listening.
Guards deserve special attention. They protect workers from rotating shafts, belts, pulleys, and flywheels, which can cause severe or fatal injuries in an instant. A missing or damaged guard should be repaired or replaced before the machine returns to operation.
Many drive problems reveal themselves during operation. Listen for changes in noise, such as grinding, squealing, knocking, or rumbling that was not present before. Monitor vibration and watch for changes in how the machine runs. Some crushers include temperature or vibration monitoring systems that can alert operators to developing problems. Make these observations from a safe position, outside guarded areas and away from rotating components. Never remove a guard or lean into the machine to get a better look while it is running.
Isolate the machine before adjusting belts, checking alignment, or removing guards. Follow the site’s lockout and tagout procedure, confirm that all energy sources are controlled, and wait for rotating components, including heavy flywheels, to come to a complete stop. Flywheels on some crushers store significant energy and can continue turning for some time after shutdown.
After adjustments or repairs, reinstall every guard before restarting the machine, and run it briefly under observation from a safe position to confirm normal operation.
Key takeaway: Inspect bearings, belts, sheaves, couplings, and guards regularly, listen and watch for changes in noise and vibration from a safe position, and fully isolate the machine before adjusting belts or removing guards.
Crushing Components and Wear
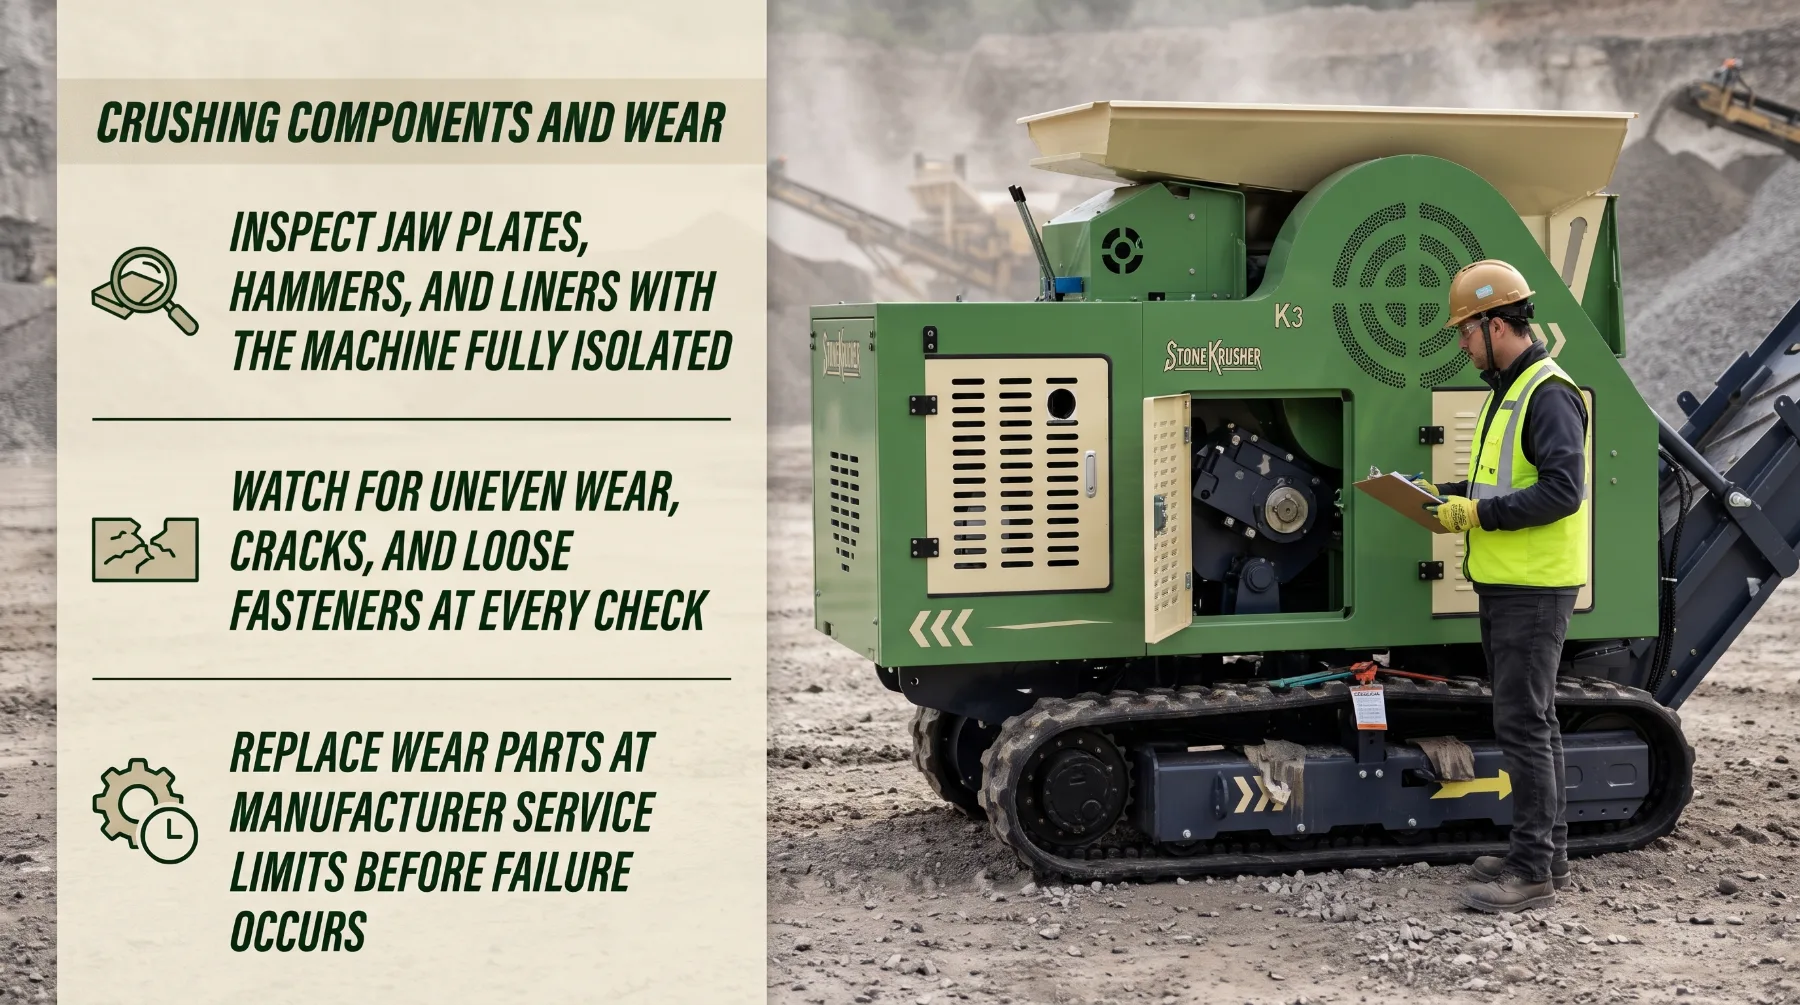
The crushing chamber is where the real work happens, and it is also where wear is most aggressive. Rock contacts steel surfaces thousands of times per hour, gradually changing the shape and thickness of every wear part. Monitoring that wear is essential for both product quality and machine protection.
Inspect these parts with the machine stopped, isolated, and locked out according to the manufacturer’s procedure. Never enter or reach into the crushing chamber while the machine can move. Rotors and flywheels can continue turning after power is removed, and gravity can shift loose rock or components. Confirm that all moving parts have come to a complete stop and are secured before inspection begins.
Worn components affect more than the parts themselves. As crushing surfaces wear, the chamber geometry changes. Material flow becomes less consistent, the product size can shift, and throughput may drop. Severely worn parts can also expose the frame or holders behind them to direct contact with rock, leading to far more expensive repairs.
Replace components at the manufacturer’s service limits rather than waiting for failure. Some wear parts, such as certain jaw plates or blow bars, may be designed to be rotated or reversed to extend service life. Follow the manufacturer’s instructions for when and how to do this. Use specified replacement parts, confirm that installed components match the approved configuration, and tighten fasteners to the torque values listed in the service manual.
Changing wear parts often involves heavy components and lifting equipment. Use the manufacturer’s designated lifting points and approved lifting tools, and keep workers clear of suspended loads.
Key takeaway: Inspect jaw plates, hammers, liners, and other wear parts with the machine fully isolated, watch for uneven wear, cracks, and loose fasteners, and replace components at the manufacturer’s service limits before failure occurs.
Conveyor and Material Flow Checks
A crusher can only produce as fast as material moves through it. Conveyors, feeders, and discharge areas keep rock flowing into the crushing chamber and finished product flowing out. When buildup, misalignment, or worn components interrupt that flow, production slows, spillage increases, and the risk of damage rises across the entire line.
Conveyors, feeders, and discharge areas must remain clear of buildup during construction material processing to maintain smooth material movement. Fines, wet material, and sticky clay tend to accumulate at transfer points, under belts, around rollers, and in chutes. Left unchecked, this buildup can cause belts to mistrack, rollers to seize, and material to spill onto walkways and equipment.
Tracking problems usually have a cause that should be corrected rather than masked. Uneven loading, buildup on rollers or pulleys, a damaged splice, or a misaligned frame can all pull a belt off center. Find and address the root cause, and make tracking adjustments only according to the manufacturer’s procedure.
Blockages are among the most dangerous situations around a crusher. A lodged rock or jammed chute creates strong pressure to clear it quickly and get production moving again. Resist that pressure. Stop and isolate the machine before removing lodged rock or debris, following the approved lockout procedure. Do not reach into moving equipment under any circumstances. Conveyor belts and pulleys can pull a hand or arm into a pinch point faster than a person can react.
Confirm that conveyor safety devices work as intended, including pull cords, emergency stops, and guards at pinch points. Keep walkways beside conveyors clear of spillage so workers have safe access for inspections.
Key takeaway: Keep conveyors, feeders, and transfer points clear of buildup, inspect belt condition, tracking, and rollers regularly, correct the cause of tracking problems, and always stop and isolate the machine before clearing blockages.
Electrical and Control Systems
Electrical and control systems coordinate every part of a modern crushing operation. They start and stop motors, manage feed rates, monitor operating conditions, and shut the machine down in an emergency. A reliable control system protects both production and people. A faulty one can cause unexpected starts, failed shutdowns, or repeated interruptions that slow the whole plant.
Damaged cables, unreliable switches, or repeated faults should be addressed before returning the machine to operation. A fault that appears and disappears may point to a loose connection, a failing component, or damage from vibration. Ignoring it risks a more serious failure or a safety device that does not work when it is needed.
Crushing environments are hard on electrical equipment. Fine dust can enter enclosures, coat components, and contribute to overheating. Moisture from rain, washdown, or dust suppression systems can cause corrosion and short circuits. Keep electrical components protected from dust and moisture where specified, confirm that enclosure doors close and seal properly, and keep cable entry points sealed.
Electrical inspection and repair work should be carried out by qualified personnel. Before working on any electrical component, isolate the power supply according to the lockout procedure and verify that the circuit is de-energized. Operators should report electrical problems rather than attempting repairs themselves.
Key takeaway: Test emergency stops, warning devices, interlocks, and control panels as scheduled, inspect cables and connections for damage, protect electrical components from dust and moisture, and correct repeated faults before returning the machine to service.
Maintenance Records and Service Intervals
Inspections and repairs deliver their full value only when they are documented. Maintenance records turn individual checks into a clear history of the machine’s condition, helping maintenance teams plan work, control costs, and catch recurring problems before they cause major interruptions.
Good records reveal patterns. A wear part that consistently fails earlier than expected may point to a feed problem, an incorrect setting, or unsuitable material. A hydraulic hose that keeps failing in the same location may indicate a routing or clamping issue. A rising number of electrical faults may signal a component nearing the end of its life. These patterns are difficult to spot from memory alone.
Service intervals provide the framework for planned maintenance. The manufacturer’s schedule sets the baseline for fluid changes, filter replacements, lubrication, inspections, and wear-part checks. Real operating conditions, however, can differ significantly from average assumptions. Maintenance intervals may need adjustment for abrasive rock, heavy workloads, and dusty conditions, but changes should follow the manufacturer’s guidance. Highly abrasive material such as granite or quartzite wears crushing surfaces faster, continuous multi-shift operation accumulates hours quickly, and heavy dust loads clog filters sooner.
Shortening intervals in demanding conditions is a sound practice when it stays within the manufacturer’s recommendations. Extending intervals beyond the published schedule is risky and should only be considered with manufacturer approval and supporting data from fluid analysis or wear measurements.
Use the service manual for machine-specific torque values and replacement procedures. General figures or procedures from other machines may not apply and can lead to loose fasteners, damaged threads, or incorrectly installed components.
Records also support safety and accountability. They confirm that defects were corrected before the machine returned to work and that required inspections were completed on schedule.
Key takeaway: Record every inspection, fluid change, wear-part replacement, and recurring fault, adjust service intervals for abrasive and heavy-duty conditions within the manufacturer’s guidance, and rely on the service manual for torque values and procedures.
Conclusion
Hydraulic and mechanical inspections help stone crushing machines operate reliably and safely. Checking hydraulic fluid level and condition, inspecting hoses and cylinders, and depressurizing the system before service keep hydraulic functions dependable and protect technicians from injection injuries. Monitoring jaw plates, hammers, liners, and other wear parts, and replacing them at the manufacturer’s limits, protects product quality and the machine’s structure. Watching bearings, belts, couplings, and guards catches drive problems early, while clear conveyors and well-tracked belts keep material moving through the line. Tested emergency stops, warning devices, and control systems ensure the machine starts and stops exactly as intended. Detailed maintenance records tie these checks together, revealing wear patterns and supporting service intervals that match real operating conditions. Throughout every task, proper isolation and lockout procedures remain the foundation of safe maintenance. When your team applies these checks consistently, you can detect developing problems early, plan maintenance before major interruptions, and keep your crushing operation productive shift after shift.
FAQs
How often should a stone crusher be inspected?
Follow the manufacturer’s maintenance schedule and perform the required pre-operation checks each shift or workday. Daily checks typically cover fluid levels, visible leaks, guards, emergency stops, and conveyor condition, while more detailed inspections of wear parts, bearings, and drive components follow scheduled intervals. Inspect more often when processing highly abrasive material or operating in heavy dust.
What can indicate hydraulic trouble?
Visible leaks, unusual cylinder movement, overheating, or changes in hydraulic response can indicate a problem. Other warning signs include milky, dark, or foamy fluid, unusual pump noise, settings that drift during operation, and filter restriction alerts. Investigate these signs promptly, and always depressurize the system before servicing any component.
Can operators clear a jam while the crusher is running?
No. Stop, isolate, and follow the approved lockout and clearing procedure before addressing a blockage. Confirm that all moving parts, including flywheels and rotors, have come to a complete stop and that stored energy is controlled. Never reach into the crushing chamber, a conveyor, or a chute while the machine can move.
Why record wear-part changes?
Records help identify wear patterns, plan replacement, and compare operating conditions over time. They show whether parts are lasting as long as expected, reveal problems such as uneven feed or incorrect settings, and help you order replacement parts before they are needed, reducing unplanned downtime.